
|
Software: Ulead PhotoImpact XL but similar for other versions |
Title: Stamped Letters |
| Author: Carol (Miniviolet) |
Skill Level: Beginner |
| Terms of Use: You may not re-distribute or post this tutorial as your own. However, what you create with this tutorial is yours to do with as you please. A link back to this tutorial is appreciated but is not required. The tutorial itself along with the images herein are copyrighted to me and all rights are reserved. |
|
| Description:Here is a really easy way to achieve a stamped look for your lettering. |
©Carol (Miniviolet) |
| 1. Choose a font style that is thick for the best effect. In this example I am using a font named “Stencil”. | |
| 2. If your letter is not already selected, select it again using either the pick or text tool. In your easy palette go to paining gallery, and then find “sponge 2”. Right click on “sponge 2” and select “modify properties and apply”. | 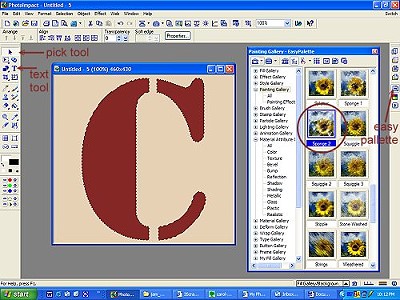 |
| 3. A Painting dialog box will come up. Right click on the white box named “Background”. Select “color on screen” and click the eyedropper on the background color underneath your letter. If your background is not a solid color, pick the predominant color. (This method works best with a solid background). | 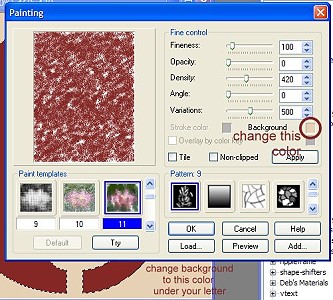 |
| 4. Almost done! Use the pick tool to select your letter again. On the top menu, change the soft edge until you are happy with the look. In this example I used “6”. | 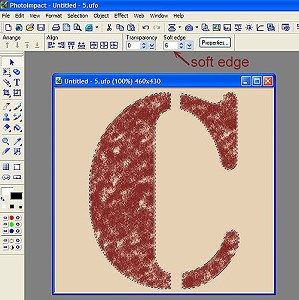 |
| 5. That’s it! A quick and easy way to give your lettering that stamped look. |  |
|
Questions? email me ©Carol (Miniviolet) 2007 |
|