
|
Software: Ulead PhotoImpact 11 but similar for other versions |
Title: Color Spot |
| Author: Carol (Miniviolet) |
Skill Level: Beginner |
| Terms of Use: You may not re-distribute or post this tutorial as your own. However, what you create with this tutorial is yours to do with as you please. A link back to this tutorial is appreciated but is not required. The tutorial itself along with the images herein are copyrighted to me and all rights are reserved. |
|
| Description:Add a spot of color to you black and white photo for an artistic look. |
©Carol (Miniviolet) |
| 1. We are going to start with this photo. |  |
| 2. Right click and select “copy”, then right click again and select “paste”. You should now have a duplicate image on top of the original. You can check this in your layers manager. If it is not already open, you can find it here on the right of your workspace. |  |
| 3. Your copied image should still be selected. If not, select it in the layer manager. Click on “Photo”, “Enhance”, “Monochrome”. | |
| 4. Next, click on the object paint eraser tool. | 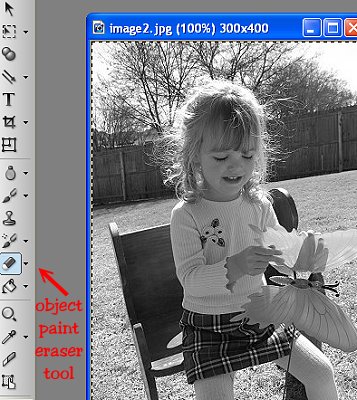 |
| 5. This is where the fun begins! Simply start erasing where you want the color to show through. Set the eraser size and softness that best works for the image you are using. If you erase something by accident, you can toggle the un-erase tool and paint it back in. You will want to zoom in on your image to get the detailing precise around the edges. | 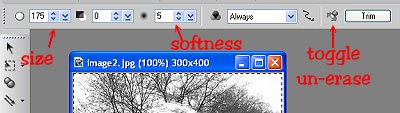 |
| Here is my finished image! |  |
|
Questions? email me ©Carol (Miniviolet) 2007 |
|